다음으로 시리얼통신에 대해서 학습하려고 했다
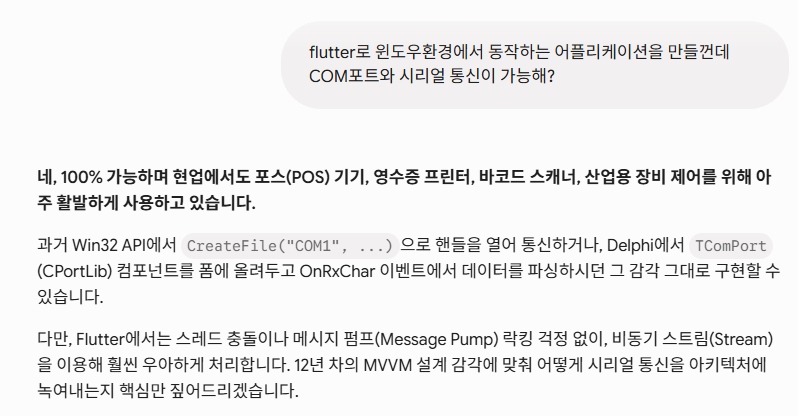
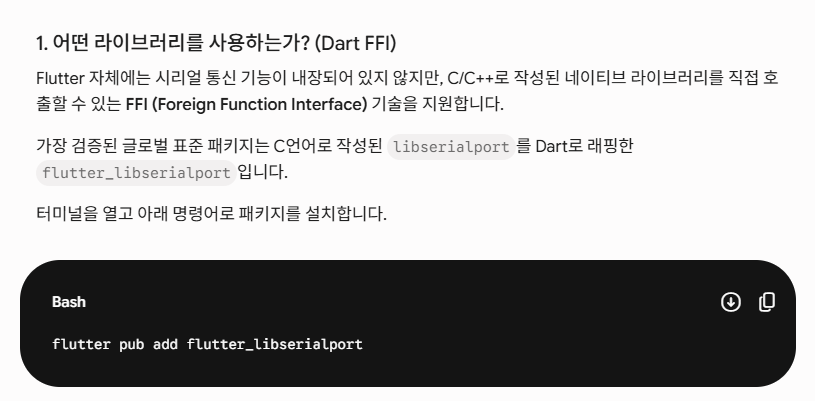
어쩌면 당연하게도 네이티브로 작성된 후 Flutter로 래핑된 라이브러리가 이미 존재한다.
(Flutter 자체 라이브러리가 있는지 물어본거긴한데...)
더 배우기전에 실제로도 쓸 수 있는지 라이센스 확인부터..
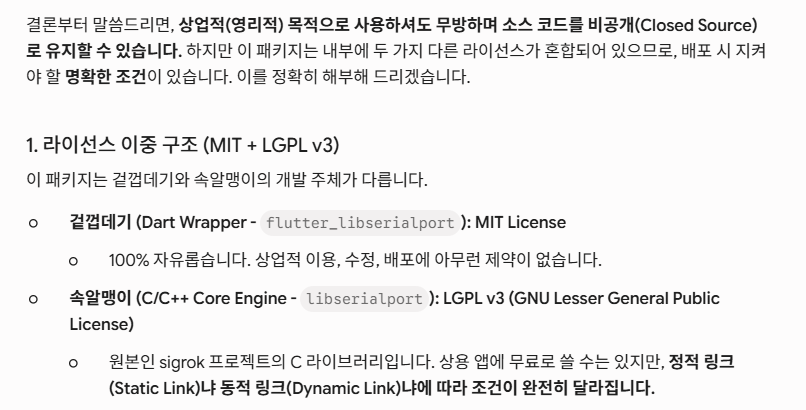
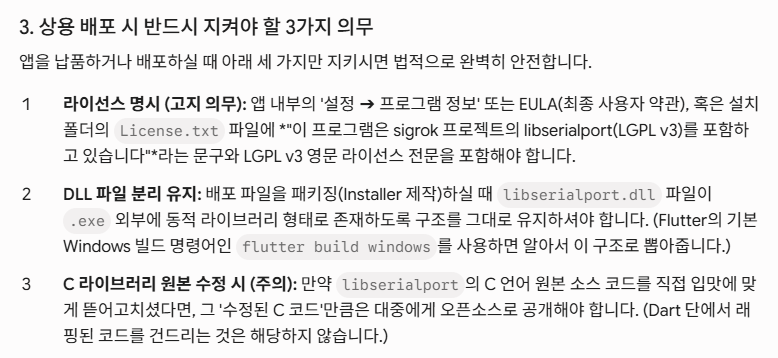
C라이브러리 자체를 수정할 일도 없을테고 (수정하고 싶지도 않기에) 사용에는 전혀 걱정없어 보인다
그리고 라이브러리를 다운받을때 빨간색으로 에러가 발생했다
Building with plugins requires symlink support.


Please enable Developer Mode in your system settings. Run

  start ms-settings:developers

to open settings.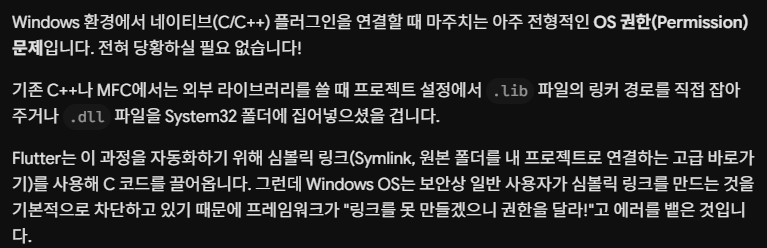
관리자 권한을 주고 설치 성공!
이후 어떤 장비를 연동해볼까 하다가 만만한 영수증프린트 장비 연동하기로 함
시리얼 통신 연동에 사용할 ViewModel인 SerialProvider.dart를 만들어줌
import 'dart:async';
import 'dart:typed_data';
import 'package:flutter/material.dart';
import 'package:flutter_libserialport/flutter_libserialport.dart';

class SerialProvider extends ChangeNotifier {
  SerialPort? _serialPort;
  SerialPortReader? _reader;
  StreamSubscription<Uint8List>? _subscription;

  // 상태 변수
  List<String> _availablePorts = [];
  bool _isOpen = false;
  String _receivedData = "";

  // UI 노출용 Getter
  List<String> get availablePorts => _availablePorts;
  bool get isOpen => _isOpen;
  String get receivedData => _receivedData;

  // 1. PC에 꽂힌 COM 포트 목록 검색
  void scanPorts() {
    _availablePorts = SerialPort.availablePorts;
    notifyListeners();
  }

  // 2. COM 포트 연결 (Win32의 CreateFile 역할)
  bool connect(String portName) {
    if (_isOpen) disconnect();

    _serialPort = SerialPort(portName);

    // 읽기/쓰기 모드로 포트 오픈 (보드레이트 등 설정 가능)
    if (!_serialPort!.openReadWrite()) {
      print('포트 열기 실패: ${SerialPort.lastError}');
      return false;
    }

    // 통신 속도(BaudRate) 등 포트 환경 설정 (DCB 구조체 세팅과 동일)
    final config = SerialPortConfig();

    config.baudRate = 9600;
    config.bits = 8;
    config.stopBits = 1;
    config.parity = 0; // None

    // 💡 [수정] 모든 하드웨어 및 소프트웨어 흐름 제어 라인을 완전히 비활성화 (0 설정)
    // 3핀 케이블 환경에서 가장 안전하게 데이터를 밀어 넣는 방식입니다.
    config.rts = 0;
    config.dtr = 0;
    config.cts = 0;
    config.dsr = 0;
    config.xonXoff = 0;

    _serialPort!.config = config;
    config.dispose();

    _isOpen = true;

    // 3. 수신 인터럽트(이벤트) 설정
    _reader = SerialPortReader(_serialPort!);

    // Stream.listen()이 바로 Delphi의 OnRxChar 이벤트 핸들러 역할입니다.
    _subscription = _reader!.stream.listen((Uint8List data) {
      // 바이트 배열을 문자열로 변환하여 버퍼에 누적 (ASCII 기준)
      _receivedData += String.fromCharCodes(data);

      // 데이터가 들어왔으니 화면 갱신 지시
      notifyListeners();
    });

    notifyListeners();
    return true;
  }

  void sendBytes(List<int> bytes) {
    if (!_isOpen || _serialPort == null) return;

    final data = Uint8List.fromList(bytes);
    int totalWritten = 0;

    // 1. [핵심] 남은 바이트가 없을 때까지 끝까지 밀어넣는 보장 루프
    while (totalWritten < data.length) {
      // 이미 쓴 만큼 잘라내고 남은 데이터만 전송
      final chunk = data.sublist(totalWritten);

      // timeout 옵션을 주어 무한 대기를 방지할 수 있습니다.
      final written = _serialPort!.write(chunk, timeout: 1000);

      if (written <= 0) {
        print('경고: 시리얼 버퍼 전송 중단');
        break;
      }
      totalWritten += written;
    }
  }

  // 5. 포트 닫기 (메모리 해제 필수)
  void disconnect() {
    try {
      _subscription?.cancel();
      _reader?.close();
      _serialPort?.close();
      //_serialPort?.dispose();
    } catch (e) {
      print('포트 해제 중 예외발생 : $e');
    } finally {
      _isOpen = false;
      notifyListeners();
    }
  }
}
몇차례 수정이 있었는데
- config.rts 코드부분에서 값을 세팅해주니 정상적으로 출력이 안되었다.
- 최초 baudrate만 맞춰주었는데 bits와 parity를 세팅안해주니 글자가 깨졌다(한글+영어 모두)
- 처음에 데이터를 한방에 write하니까 글자가 짤렸는데 write 후 리턴값으로 보낸 길이를 제외하고 다시 루프를 돌며 전송하게 하여 모두 출력되었다
- 포트닫기 처리시 _serialPort를 Close 후에 Dispose하니 exceiption이 발생해서 프로그램이 죽어서 제거했다 혹시나 메모리 정리가 안된다 하더라고 flutter의 GC가 나중에 주워간다
그리고 Kisok_provider.dart쪽
import 'package:cp949_codec/cp949_codec.dart'; // CP949 인코더 추가
import 'package:flutter/material.dart';
import '../models/kiosk_models.dart';

class KioskProvider extends ChangeNotifier {
  // 1. 마스터 데이터 세팅 (실무에서는 DB나 API에서 가져옴)
  final List<Product> _masterProducts = [
    Product(id: 1, name: '아메리카노', price: 3000, category: '커피'),
    Product(id: 2, name: '카페라떼', price: 3500, category: '커피'),
    Product(id: 3, name: '바닐라라떼', price: 4000, category: '커피'),
    Product(id: 4, name: '아이스티', price: 3500, category: '음료'),
    Product(id: 5, name: '자몽에이드', price: 4500, category: '음료'),
    Product(id: 6, name: '치즈케이크', price: 5000, category: '디저트'),
    Product(id: 7, name: '초코쿠키', price: 2000, category: '디저트'),
  ];

  // 2. 관리할 내부 상태 변수 (은닉화)
  final List<CartItem> _cartItems = [];
  String _selectedCategory = '커피';

  // 3. 외부 View에서 안전하게 읽어갈 Getter
  // 선택된 카테고리의 상품만 필터링하여 반환
  List<Product> get products =>
      _masterProducts.where((p) => p.category == _selectedCategory).toList();
  List<CartItem> get cartItems => _cartItems;
  String get selectedCategory => _selectedCategory;

  // 장바구니에 담긴 전체 금액 실시간 합산 연산
  int get totalPrice =>
      _cartItems.fold(0, (sum, item) => sum + item.totalItemPrice);

  // 4. 비즈니스 로직 함수 (Commands)
  void changeCategory(String category) {
    _selectedCategory = category;
    notifyListeners();
  }

  void addToCart(Product product) {
    final existingIndex = _cartItems.indexWhere(
      (item) => item.product.id == product.id,
    );

    if (existingIndex >= 0) {
      _cartItems[existingIndex].quantity++;
    } else {
      _cartItems.add(CartItem(product: product));
    }
    notifyListeners();
  }

  void removeFromCart(int index) {
    _cartItems.removeAt(index);
    notifyListeners();
  }

  void clearCart() {
    _cartItems.clear();
    notifyListeners();
  }

  Future<List<int>?> processPayment() async {
    if (_cartItems.isEmpty) return null; // 결제할 내용이 없으면 null 반환

    try {
      // 1. 가상의 네트워크 승인 및 DB 저장 지연 (1초)
      await Future.delayed(const Duration(seconds: 1));

      // 2. 영수증 데이터(바이트 배열) 생성
      final receiptBytes = await _generateReceiptBytes();

      // 3. 비즈니스 규칙에 따라 장바구니 비우기 및 화면 갱신 방송
      _cartItems.clear();
      notifyListeners();

      // 4. View가 활용할 수 있도록 컴파일된 영수증 데이터를 리턴합니다.
      return receiptBytes;
    } catch (e) {
      debugPrint('결제 처리 중 에러 발생: $e');
      return null; // 실패 시 null 반환
    }
  }

  // 💡 영수증 레이아웃을 ESC/POS 바이트(Hex) 배열로 변환해 주는 내부 헬퍼 함수
  Future<List<int>> _generateReceiptBytes() async {
    // List<int> bytes = [];

    // // 1. 프린터 초기화 (ESC @)
    // bytes += [0x1B, 0x40];

    // // 💡 [핵심] 한글 모드(FS &) 진입 커맨드 제거!
    // // 💡 [핵심] CP949 변환 없이 Dart 기본 UTF-8 바이트로 직행!
    // bytes += cp949.encode('--- UTF-8 Test ---\n');
    // bytes += cp949.encode('1. 아메리카노: 3000원\n');
    // bytes += cp949.encode('2. 카페라떼: 3500원\n');
    // bytes += cp949.encode('------------------------\n\n');

    // // 종이 자르기
    // bytes += [0x0A, 0x0A, 0x0A];
    // bytes += [0x1D, 0x56, 0x41, 0x10];

    // return bytes;
    List<int> bytes = [];

    // 1. 프린터 하드웨어 초기화 및 한글 모드 진입
    bytes += [0x1B, 0x40]; // ESC @
    bytes += [0x1C, 0x26]; // FS & (한글 모드 ON)

    // 💡 [핵심] 한글 CP949 인코딩 + 줄바꿈(\r\n) 처리를 전담하는 내부 헬퍼 함수
    List<int> printLine(String text) {
      return cp949.encode('$text\r\n');
    }

    // 2. 영수증 헤더
    // (보통 80mm 영수증은 영문/숫자 기준 42~48자, 58mm는 32자가 들어갑니다)
    bytes += printLine('================================');
    bytes += printLine('       커피 키오스크 주문서');
    bytes += printLine('================================');
    bytes += printLine(''); // 빈 줄 띄우기

    // 3. 장바구니 상품 목록 출력 (동적 로직 복구)
    for (var item in _cartItems) {
      // 💡 실무 팁: 한글은 2바이트, 숫자는 1바이트라 스페이스바 정렬이 매우 까다롭습니다.
      // 가장 깔끔하고 안전한 레이아웃은 [1줄: 상품명], [2줄: 수량 및 금액]으로 나누는 것입니다.
      bytes += printLine('${item.product.name}');

      // 금액이 우측에 오도록 스페이스바로 적절히 여백을 줍니다.
      bytes += printLine(
        '    ${item.quantity}개                 ${item.totalItemPrice}원',
      );
    }

    // 4. 총 결제 금액
    bytes += printLine('--------------------------------');
    bytes += printLine('총 결제 금액:             $totalPrice원');
    bytes += printLine('================================');

    // 커팅기 칼날 위치까지 종이를 밀어내기 위한 공백 라인 4줄 (필수)
    bytes += printLine('');
    bytes += printLine('');
    bytes += printLine('');
    bytes += printLine('');

    // 5. 종이 자르기 커맨드 (오토 커터)
    bytes += [0x1D, 0x56, 0x41, 0x10];

    return bytes;
  }
}
- 정상출력안되어서 인코딩문제인가 하고 cp949, utf8 둘 다 해보았으나 시리얼 세팅 문제였었음
- 처음엔 Gemini가 Kiosk_provider가 SerialProvider를 참조해서 출력을 날리게 코드를 작성했다 딱봐도 좋은구조가 아닌거같아서 물어보았다
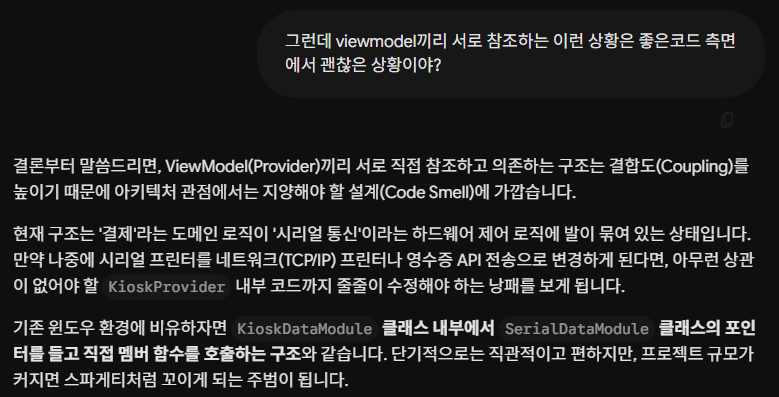
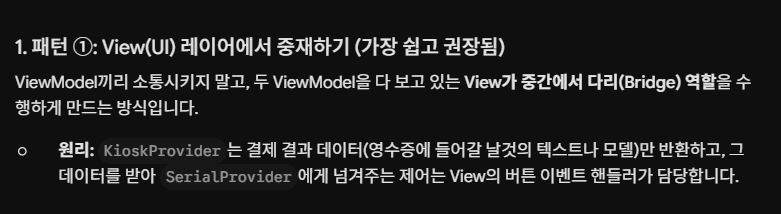
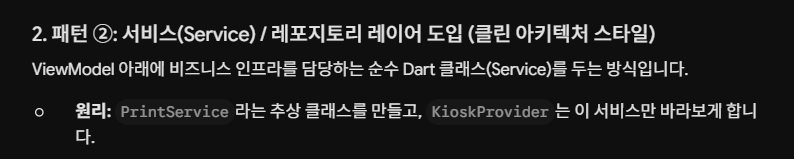
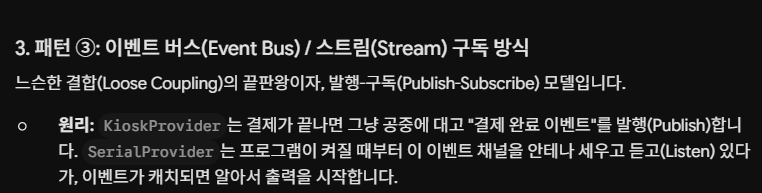
가장 추천하는 패턴이자 예제코드도 가독성이 괜찮길래 1번을 선택
마지막 View수정은 다음글에...
'운동하는 개발자 > Flutter' 카테고리의 다른 글
| 13년차 응용프로그래머, Gemini에게 Flutter 배우기 - 8 libserialport (2) (0) | 2026.06.17 |
|---|---|
| 13년차 응용프로그래머, Gemini에게 Flutter 배우기 - 7 MVVM (2) (0) | 2026.06.06 |
| 13년차 응용프로그래머, Gemini에게 Flutter 배우기 - 6 MVVM (1) (0) | 2026.06.03 |
| 13년차 응용프로그래머, Gemini에게 Flutter 배우기 - 5 SQLite (0) | 2026.05.31 |
| 13년차 응용프로그래머, Gemini에게 Flutter 배우기 - 4 RestAPI (0) | 2026.05.27 |


